Thursday, October 27, 2011

Aki Con 2011

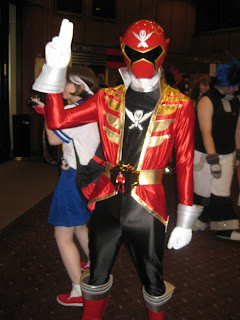
My boyfriend and I met up with a couple friends to check out this Aki Con over in Bellevue.  We dressed up on Saturday, and did the rest of the shopping on Sunday. It was pretty neat -very small, especially compared to Sakura con.  I feel like more people here are friendlier, and more likely to socialize with others.  Anyways, it was pretty hilarious because my bf and our friend decided to do a LARPing competition hahah it was GREAT.  pretty funny.  We dressed up from Soul Eater, and yes I dragged my death scythe around in this small place.. 

Anyways here are some photos of our time there.


On Sunday, the majority of that time was watching my bf and our friend LARP and it was just kind of hilarious.. but not a whole lot of photos from that -  just videos! 


Anyways that was our first Aki Con!

Lucky Mug!

So I got my boyfriend to join me in my pottery painting experience.. and it was so awesome hahaha.  He took.. like.. FOREVER painting his.. i mean i knew that some guys are like "ew why would i paint pottery" but then once they start, they have extreme attention to detail it's crazy.  Anyways, so I wanted my mug to contain clovers.  4 leaf clovers to be exact. So it's like, my lucky mug! I actually ended up loving the way it turned out - i mean, wouldn't you want to buy this at the store?!??!!? It could be like my own collection. The Lillian Wong collection. Eh.. that sounds really weird.  I'll just call it the.. Pearl Collection.  Anyways that's years down the road when i can actually learn how to be artsy but for now maybe i was just REALLY lucky.. hahaha..anyways 


My mug!


My boyfriend's mug!


Oooo and I made a WATERMELON COASTER!! So there IS some kind of crochet in this blog at least.........well here's the watermelon coaster for my mug! Pattern is by Yarn Pixie.

Watermelon (BFF) Bowls !

Oh my gosh I can't believe I havn't posted this yet - I just recently got into pottery painting!! Like, you go buy some ceramic pottery at the pottery place and just paint away - they will glaze it for you for free!!! Anyways, I started a teapot back in when I was in grad school right before I graduated. It turned out kind of.... funnny........... not quite what I expected.  But no photos of that ANYWAY.  however, I found a place over in east Bellevue (WA) and I LOVED their collection. I have yet to find an even bigger store.   Their website is here : http://www.paintedbykathy.com/

Anyways I managed to convince my bff to paint, and she convinced a few of our mutual friends to come along too and paint!! haha so it was this semi large painting party and i think we were the oldest ones there...


We ended up painting WATERMELON BOWLS! We call these the "BFF Bowls" . Because when you put the two together you make one :) AWWWWW <3 


After it is painted
After it's glazed! 

Anyways hers came out a lot nicer because she made it nicer.. hahaha i was a bit sloppy but overall i was still happy! Oh gosh wait for the next post... I got my boyfriend to paint with me :)

Link Hat for the Cat! (pattern)

I plan to make this hat into an ELF HAT soon!!! I have tons of things I plan to do.. but for now this can be like... a Link Hat. Link from Zelda, Link wearing a pumpkin sweater, whatever your imagination is..  Change the color to Red and add some popcorn stitches and you get a Santa Hat!


But for those of you just needing some guide on how to make spaces for those cute lil ears, here's what I do for my cat hats:


Used a G hook for this, worsted weight yarn.

rnd 1: 5 sc in ring (5)
rnd 2: 5 sc around (5)
rnd 3: 2 sc in every sc (10)
rnd 4: 1 sc in every sc (10)
rnd 5: [2 sc in next sc, sc in the next 4 sc] repeat around (12)
rnd 6: 1 sc in every sc (12)
rnd 7: [2 sc in next, sc in next 3 sc] repeat around (15)
rnd 8: 1 sc in every sc (15)
rnd 9: [2 sc in next sc, sc in the next 2] repeat around (20)
rnd 10: [2 sc in next sc, sc in the next 4 sc] repeat around (24)
rnd 11: [2 sc in next sc, sc in the next 5 sc] repeat around (28)
rnd 12 [2 sc in next sc, sc in the next 6] repeat around (32)


ok now for ears..
rnd 13: ch 20, skip 7 sc, slip stitch into 8th sc and sc in the next 8sc.
ch 20, skip 7 sc, slip stitch into 8th sc and sc in the next 8sc. 
rnd 14: sc into each sc and chain. Slip stitch into last sc.


TADA!

3 inches for the base. Stop lookin at my terrible nails...

My rule of thumb is to make sure the base of the hat is around 3 inches and then from there start making the spaces for the ears. I like the base of the hat to sit a little bit on the ears but not enough to make their ears go completely flat.  You may choose to shorten the chains if you like if it is also too large.


I usually like to add a chin strap, like if the character may have a beard, then i'll add a beard and make that a "chin strap".  oooo I can't wait for St. Pattys Day.... >:)


Now go make some kitty hats!!!! 

Wednesday, October 26, 2011

Pumpkin Cat!

It's about that time, time for a new sweater for my sweet baby Fib! I made another sweater, this time halloween based, and the pattern is based on DIY Maven's sweater, except i extended the sweater to make it longer.  It's a great pattern because it doesn't restrict the movement of the cat, and i believe many cats could wear this too.  


Enjoy!! He was purring so loudly in all these photos~!


He's "kneading"